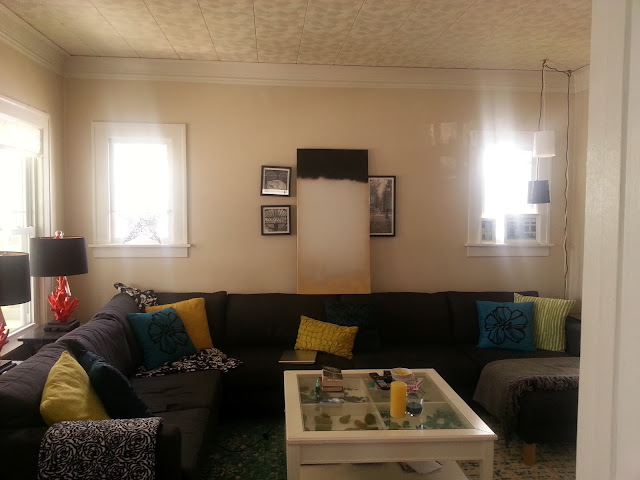
Before I moved into this house, I lived at my parents where I had the basement as a living room/dining room/office for 22 year old self. I had collected furniture and artwork and set up my living space so that not only would I have a place to hang out away from my parents, and that I would take with me when I bought my first place. Well, when I did buy my new place, the wall space wasn't the same and I ended up with artwork above the couch that was always too small. Beside the fact that it was too small for the space, I'd been looking at it for 7 years, and it wasn't my style any more.
When Husband and I got married, we got a larger couch and painted the walls a lighter color which only made the problem worse. Along came one of my favorite food and healthy living bloggers to save the day. The talented Taralynn behind
Undressed Skeleton is not only an inventive chef, but artistic and creative. When she posted on her
bedroom, and I saw her
DIY art, I knew it'd be perfect above our couch. She hadn't posted a tutorial so it was up to me to figure it out.
This first thing I did was buy materials and make sure they'd fit in the space the way I intended them to. No need to waste time and money on something that wouldn't work!
 |
| That'll do Donkey, that'll do. |
Net step was to get them outside - on a tarp this time! (Although
colored grass is pretty darn exciting too.) I knew I wanted the edges gold. I had seen it on a $200 painting at Home Goods and thought it was a neat unexpected touch. I didn't bother masking off the top of the canvas since I figured it was going to be covering it in paint drips anyway. A little bit of the gold got onto the top edge of the canvas and I decided that I liked it so much, I added more to one of the short ends. And I liked that so much I decided to add black to the other short end for contrast. The gold end stopped a little too suddenly and I was out of gold paint so I added a little silver spray paint to blend it in with the white canvas. I stopped there deciding that my background was just enough.
And then it rained all over my beautifully prepped paintings. Whomp. Whomp. Husband helped me as I rushed to get plastic over my
babies pieces of artwork. Which obviously got stuck to the paint so there were some touch ups and imperfections. One of the best parts of this project though, is that it looks better with a few imperfections.
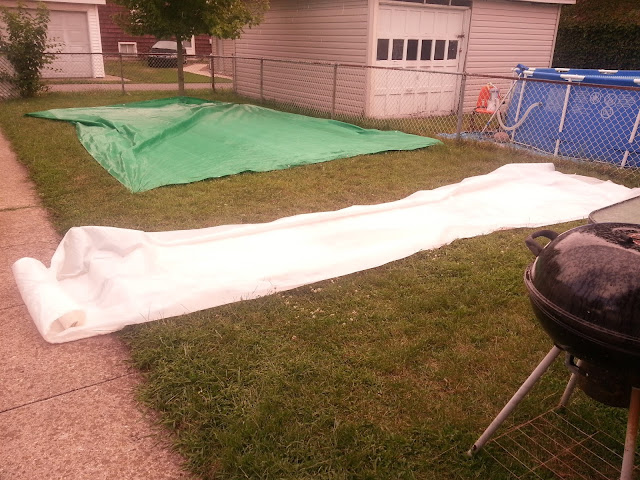 |
| Green tarp is courtesy post-camping clean up, and don't even get me started on the neighbor's yard. Privacy fence is desperately needed! |
So once the spray paint layer was dry, I brought one of the paintings inside to decide which direction I wanted them to go.
 |
| Black on bottom to ground it? |
 |
| Or black on top to bring your eye up? |
Let me interject a quick tip here:
Take pictures of your artwork in progress where it will go when finished.
Text them to your design-savvy friends, get second opinions. Look at them for a while. I was initially thinking black on bottom, but once I showed Husband the pictures, and he said black on top, I rethought my decision and went with black on top. He was totally right! The couch was already so dark and I needed to bring some of that darker color up toward the ceiling.
With that decided, I started slinging paint. I propped the paintings up against our glass patio table (washable, unlike wood) I grabbed all of the craft paint we picked out, my jar of little art paint brushes in varying sizes. I filled the jar with rinsing water and got some paper towel to dry the brushes of excess water.
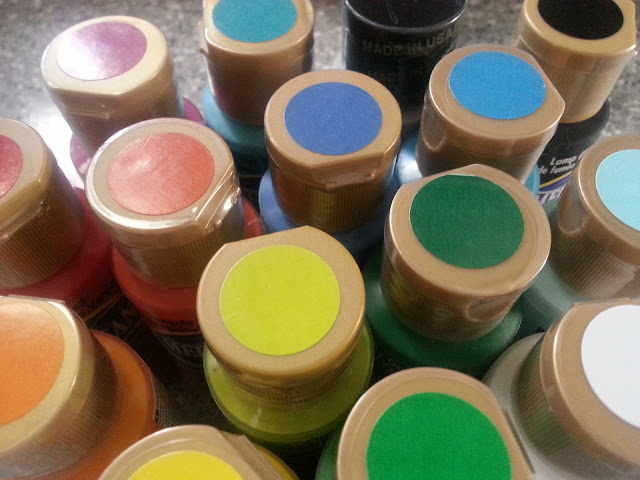 |
| Husband and I went to the craft store together and decided on a collection of colors we loved and wanted to incorporate into the room. |
I used a few different methods to "drip" my paint onto the canvases. I'll call them Drip, Squeeze, and Splash for reference:
Drip: I took the main colors we wanted to see the most of (teals and greens) and squeezed varying sized globs of paint right at the top of the canvas. I then took a paint brush (different every time so nothing looked too matchy) and gently pushed the paint down the canvas. I didn't try to make these the same length at all. Sometime I would let the paint finish dripping on it's own, sometimes I would paint it out thin on the canvas. It looked awful after this step. Yours will too. It's okay. continue onto the next step.
Squeeze: The darker and more neutral of the secondary colors we liked (oranges, reds, whites, black) I squeezed onto the painting by actually squeezing the bottle pretty hard. it hit the entire canvas this way and I hardly had to guide the paint down with a brush. This created skinnier lines that spanned the whole length of the canvas.
Splash: I reserved the brightest of our accent colors (yellow, pink, light teal) for this step. These were the colors I want to see very little of, but we needed to tie in because they're in the dinning room and office that are open to the living room. I did a maybe 2 drips from the top of the canvas and then I would splash the canvas from the bottom up with the paint. To do this, you just need to squeeze the paint as you move your arm up the length of the canvas then release the squeeze as your hand moves down.
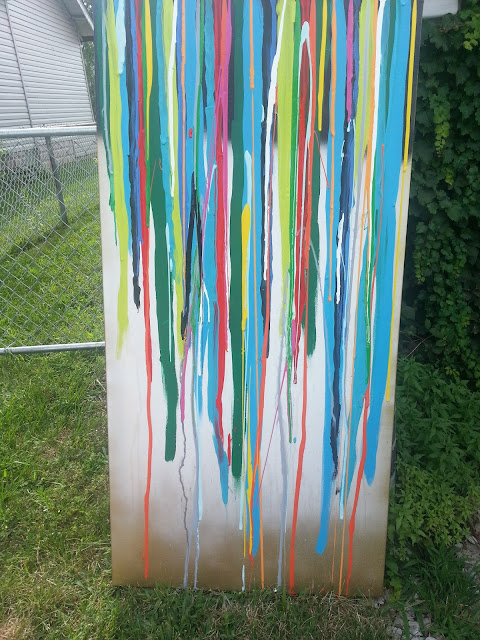 |
| You can see the blues and greens in the background are wider and more solid. The reds, oranges, whites, and blacks have may smaller drips from the top. The pinks and yellows are splashed in skinny stripes from the bottom up. |
After I finished all three steps, I took a water spray bottle on stream and lightly sprayed my painting from the top pointing down. This helped along any drops that were still working their way down and added a few cool water color-looking streaks. This step is totally optional.
 |
| Sunbathing - waiting is the hardest part! |
I let them dry in the sun for a few hours and then added a layer of UV Resistant matte coating for protection.
I was impatient to see them hung, so we risked damage to the paintings, our furniture, our floors, etc. and brought them inside to hang. We used some painter's tape and a level to place our nails then carefully hung the still tacky paintings above the couch. I hung them about 8 inches above the couch, about 10 inches from the ceiling, and about 2 inches above the windows. I think art looks funny when it's lined up with the tops of the windows or curtains. It's always safer to have art too close the the furniture than too close to the ceiling. We still have curtains to hang so these paintings will end up just between the curtains and the tops of the windows.
Before we take a look at the 'after', let's take one more peek of the 'before' shall we?
Before:
After:
We are in love with the art gallery feel in here now. The height of the ceiling is really highlighted and the scale and style of the art work is appropriate for the space.
I happily discovered that the materials I would need were very inexpensive. I spent about $55 total. Here's the breakdown:
24 x 48 canvases = $11 each X 3 = $33
Gold, silver, black spray paint = $0
Small acrylic craft paints = $1.25 each X 14= $17.50
UV Resistant Coating = $4.50
The canvases I found on sale at Michael's, 3 for the price of 1. One was normally $30, so I got all three for about $33 including tax. I already had the spray paint I needed, but if you needed to buy it each can would be about $4 a piece for a total of $12 for spray paint. The UV resistant coating was something I stumbled upon at Jo-Ann Fabrics. I wanted some kind of clear coat to keep the vibrant colors fresh year after year. This Was about $4.50 after a 40% off coupon. I had looked at 4' x 6' pieces of art online and in stores, and they were hundreds of dollars. I have to say that I'm proud and excited about my $55 DIY art.
I'd love to hear any suggestions or tips anyone has for art like this. We still have a ton of walls that need filling - any other genius DIY art ideas out there??


